Networks
Networks are defined in the Wise configuration manager at OCLC Wise > Management organizations > Networks and branch groups > Networks.
In Wise, networks are used to group branches for different purposes. Standard network types are defined in the Network types table. Branches are added to those defined network types in the (G_NET) Networks table.
(TABNTG) Network types
Networks in Wise are established in Management organizations > Networks and branch groups > Networks > (TABNTG) Network types. The following types of networks are established for your library during implementation:
| Code | Network type |
|---|---|
| TOP | Popular items profile. This profile is generated to show the most popular titles borrowed within the defined network. |
| PRF | Profiles for new items. Newly acquired materials within the defined network. |
| RES | Holds networks. Used to create search and pick-up networks. If no pick-up network is defined, the holds network will be used. |
(G_NET) Networks
The Networks table can be found in Management organizations > Networks and branch groups > Networks > (G_NET) Networks. Each network receives a unique code and a description. The values defined in this table are used in the Branches configuration to define to which networks a branch belongs.
Within this area, networks can be added for defined network types. A network is defined as a group of branches. Every network receives a unique code four-character within the chosen network type. A description can be given per network and a sequence number can be assigned per branch. Networks can be used to define pickup locations and searchable branches for fulfilling hold requests.
The networks are preferably numbered with a capital letter on the first character and with a sequence number of three characters. Only branch numbers can be used when defining networks.
Holds Networks
Holds networks are defined in (G_NET) Networks and are used in combination with the RMT settings. A hold network can be used to determine:
- Which branches can deliver items to fulfill hold requests. These are referred to as search networks. Nxxx coding of these networks is preferred.
- Which branches can be selected as a pickup location for holds. Oxxx coding of these networks is preferred.
A defined hold network can be used for both search as well as pick up. However, it is recommended to define a separate network for the different uses. Libraries are able to define multiple holds networks if certain branches or library organizations act as an individual network within a system.
For hold pick-up networks, the order in which pick up branches are displayed can be managed. For search and hold networks, it can be indicated per branch whether a delivery is made to the network.
Note: Using the special branch group V988, it can be managed that certain branches never deliver to networks.
Windowtime
Windowtime is a period of time set when new items are not able to be placed on hold. Windowtime is set in the Wise configuration manager at OCLC Wise > Holds and ILL > Policy material (RMT) > (RMT) Hold configuration per RMT, and a separate window time for specific branches can be defined in (G_NET) Networks. This function can be used when a certain branch can or is allowed to deliver earlier, for example a background collection. (See the special branch group type V994 for more information.)
Note: The system options NOWINNI and NOWINPL must be set to No in order to apply window time.
Add a new network
To add network types:
- Within the Wise configuration manager, navigate to OCLC Wise > Management organizations > Networks and branch groups > Networks > (G_NET) Networks.
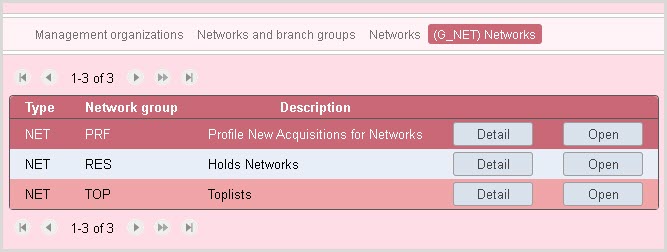
- Find the appropriate Network type from the list, and click Open. Note: TOP, PRF, and RES network types are added to (G_NET) Networks during the implementation process. See the screenshot below for reference.
- Click New.
- Define the following fields:
Field Description Type Automatically defined by the system - NET Network group Automatically defined by the system with the selected Network type code. Network 4-character code for the network. Hold search networks must use the Nxxx code format and hold pickup networks must use the Oxxx format.
See Holds networks for more information.
Description The description of the network. -
Click OK to save.
Add branches to the network
Once the network has been added to (G_NET) Networks, branches can then be added to the network. To add branches:
- Navigate to the newly added network and click Open.
- Click New.
- Populate the following fields:
Field Description Type Automatically defined by the system - NET. Network group Automatically defined by the system with the selected Network type code. Network Automatically defined by the system as the defined Network code. Branch Select the appropriate branch from the drop-down menu. Sequence number Type in a number to define the order that branches appear in the Wise Staff Client and OPAC when placing hold requests.
If no specific order is needed, type 0.
Description The description of the branch. Typing the branch name is recommended. Deliver to the network Select Yes if this branch can be used to fulfill a hold request. Windowtime for delivery to the network (after escalation) The number of days set here will only count after a hold request has been escalated to the network. The settings from (RMT) Hold configuration per RMT are followed for the escalation to the network.
If the branch can deliver the request immediately, the number of days should be set to 0. If the field is left empty, the settings within (RMT) Hold configuration per RMT will be followed.
See Windowtime for more information.
Windowtime for delivery to the network (directly) When this field is populated, the hold request will ignore the Windowtime settings within (RMT) Hold configuration per RMT and instead follow the Windowtime settings configured here for this branch.
See Windowtime for more information.
-
Click OK to save.