Session menu
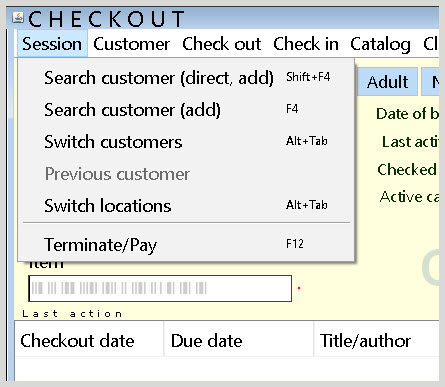
Search customers
To begin a lending session, a customer has to be selected. Customer accounts can be searched by:
- Scanning the customer's library card
- Entering the full or partial last name of the customer in the barcode field
- Manually entering the barcode in the barcode field
- Through the fields in the search screen
- Navigating to Previous customer
Once a customer account has been selected, Wise will perform a series of checks to see if:
- There are notifications about the customer.
- The customer has holds ready for pick up.
- The customer has overdue materials.
- The customer's membership is still valid.
- There are open fees on the account.
You may have the option to click Continue, or you may need to end the session, if, for example, the customer has reached the limit of materials they are allowed to check out.
Search customer (direct)
Multiple customer accounts can be active during a lending session. To search for a new customer, use Search customer (direct). The search screen appears and a new customer can be accessed.
Search customer (direct, add)
The Search customer (add) option only appears if you click on the Session tab while a customer is active. This option allows you to search for another customer within the same check out session using the same options as Search customer (direct).
Search customer
When Search customer is selected, a screen appears offering the options to:
- Search by customer information
- Search for family members
- Search for customers at the same address
Search customer (add)
The Search customer (add) option only appears if you click on the Session tab while a customer is active. This option allows you to search for another customer within the same check out session using the same options as Search customer.
Switch customers
When multiple customer accounts are open during a lending session, use the Switch customers function to toggle between accounts.
Caution: If the session is closed, all financial transactions will be offered in one settlement block. Through the Specifications option in the settlement window, fines can be managed individually for each customer.
Previous customer
After a session is closed, the customer can be selected again using the Previous customer option. A previous customer can also be made active again by entering the letter V in the barcode field and pressing enter.
Switch locations
Switch locations is used during lending. The selected location is included in the lending statistics and copied with a customer when registering new customers.
When starting the check in or check out function, the system will check each day whether a location has been selected. If a location has not been selected, the first location will be selected, in accordance with planning. With Previous and Following, the previous and next location for the library will be called up. Click on Change to choose another day or location. The following day or location can be selected with the arrow buttons. Click OK to confirm your choice
Terminate/Pay
A borrowing or lending session must always be closed. This can be done by selecting Terminate/Pay. Wise will check to see if any of the active customer accounts have fines that need to be paid. If an active customer is also a family head, Wise will immediately check if one of the family members should be charged regardless of whether they were active in the lending session.
If your system is configured to print a receipt, the receipt will be printed after the payment. Receipt settings are configured on the Peripherals in Branch management > Workplace management > Configuration.