Check in and check out screen layout
↵
Check out screen
The Check out screen can be accessed via Circulation > Check-out or from the home screen of the Wise staff client, by clicking on the Check out button. When the window is opened, a barcode field appears at the top of the screen. Scan or enter the customer's barcode number, or enter the customer's last name and press enter to search for the customer by other details. The following details appear when a customer account is retrieved:
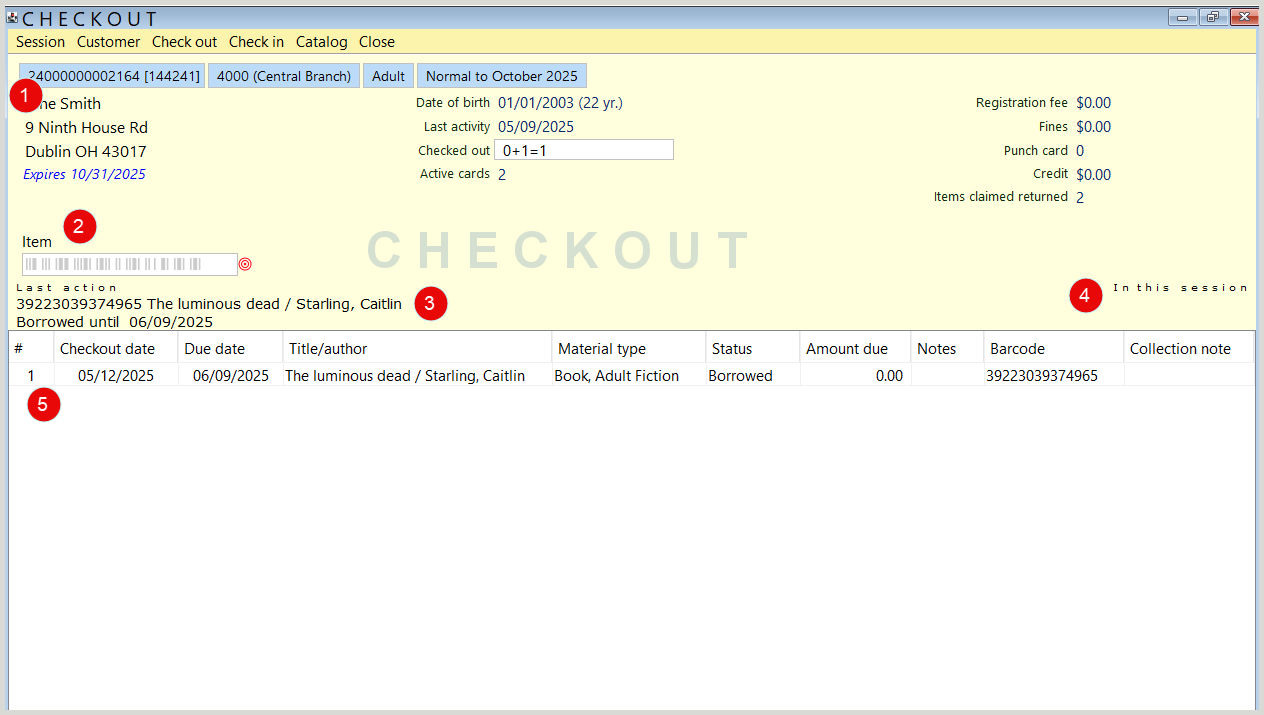
1. Customer block
The customer block contains information about the selected customer. To view customer account details, double-click anywhere in the customer block. The customer administration screen will open to the Address details tab. To return to the previous screen, click Quit at the bottom of the screen.
Blue bar
The blue bar at the top of the section displays the:
- library card number, followed by the customer number in brackets [ ]. Double click on the library card number to copy it to your clipboard
- the customer's home branch code, followed by the branch name in parentheses ( )
- customer's membership type
- the expiration date of the customer's membership, or when relevant, the membership fee status.
If there are comments about the customer, a note displays below the customer name and address information, in italics. If the customer's account is blocked, that information will also show in this area.
Left column
The left column of the customer block contains the customer's name and contact information. Below the contact information, the status of the membership is displayed. If the membership is not valid, this information displays in red.
Center column
The center column displays the customer's date of birth, last library activity, the total number of items checked out, and the number of active library cards. If the customer is exceeding the limitations of their membership, such as Last activity or In possession, the information will display in red to indicate that the customer's account may be blocked.
Note: Last activity includes customer activity taking place via SIP2.
Right column
The right column displays the customer's financial information, including Registration Fee, Fines, and Credit. As with the center block, if the customer has fines or fees that exceed the limitations of their membership, this information will appear in red to indicate that the customer's account may be blocked.
2. Scan field
This is where the barcode number of an item is scanned when checking out materials. After an item is scanned, information about the loan including review, cancelation, or different delivery date may appear next to this field.
3. Last action
This area displays information about the last loan action performed. the total amount of registrations from the current session will also display here.
4. In this session
This area shows any costs generated during the checkout session.
5. Circulation count
A circulation count with sequence numbers for items is located on the left side of both the checkin and checkout screen and is incremented with each check-in/check-out. The sequence number is also visible for borrowed items.
6. Checkout overview
All checked out items are displayed in the bottom section of the lending screen. The most recent loans appear at the top of the list.
Check in screen
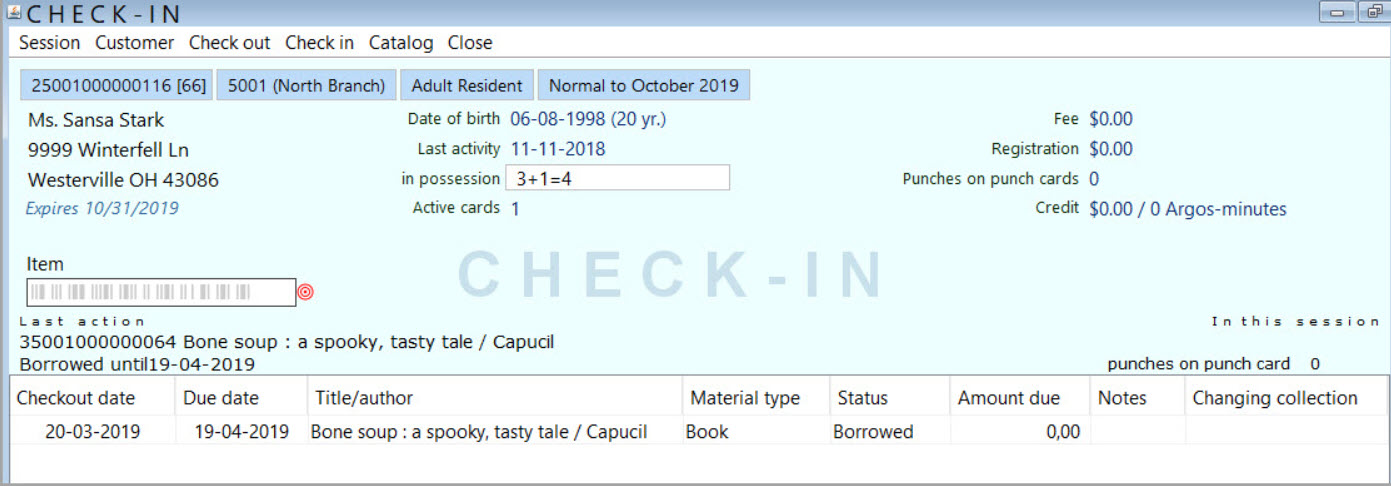
The check-in screen contains much of the same information as the Check-out screen.
The Check in screen can be accessed via Circulation > Check in or from the home screen of Wise, by clicking on the Check in button. When the screen is opened, a barcode field appears at the top of the screen. Scan the returned item barcode number to check in the item. The borrowing customer's information appears in the top of the screen, displaying the same details as appear on the check out screen.