Event management
Events are created and managed on the Event management screen. The screen displays a list of all events, organized by season. Click on a season at the top of the page to see all of the events for that season.
Events can be sorted by clicking on the column header.
Create an event
To create a new event:
- Click New at the top of the page. The Events window opens.
- Enter details in the Performer(s) and Title field.
- Provide details on the Details, Promo details, and Performances tabs.
- Click Save.
Event details tabs
Event dates, details, and ticket pricing is established on the event details tabs. This information must be provided in order to save and make tickets available. If information is missing, a notification message will display when you click Save, describing which information is missing.
Watch a video
Introduction to Wise Ticketing (15:11)
This video offers an overview of the options available in the Ticketing piece of Wise to create and manage in-person and virtual event.
Details tab
The Details tab stores the details about an activity. This information applies to all data linked to this activity.

Details panel
Provide the following information about the event in the Details panel:
| Field | Description |
|---|---|
| Notification email period | Enter the number of days before the event that a reminder email will be sent to ticketholders. |
|
Event type |
Choose the activity type from the drop-down list. |
| Genres | Click the pencil icon to add genres to the list which apply to the activity. Use ctrl+click to select multiple genres. To remove a genre from the list, right click on the term. |
| Image | An image can be added only after the activity is saved. For more information, see Upload an event picture. |
Planning section
In the Planning section, you determine when tickets are sold and when they become visible to customers.
When creating planning stages, you can monitor the progress of ticket sales and adjust prices accordingly. Tickets can have different prices depending on how close to the event they are sold. Planning stages are defined in the Wise configuration manager. For more information, see Wise Ticket configuration. You do not need to use every phase for each event, but must provide details for at least one of the planning types.
Define event phases:
- Check the box(es) next to the phase(s) when ticket sales will be active.
- Select an option from the date planning drop-down list for each activated phase:
- Days in advance - enter the number of days before the event that tickets will be available for this phase
- From - enter the date from which tickets will be available for this phase
- From the Visible and Can be sold columns, select the levels at which the tickets will be visible and available for purchase. Selection is hierarchical; when web is selected, tickets are also available at the counter and via administration. An event must be visible at Administration, Counter, or Web in order for tickets to be sold.
- Not visible - not visible to anyone
- Administration - only to library administration
- Counter - visible at the service desk and to administration
- Web - visible to customers on the website, at the service desk, and to library administration
- (Optional) Check the Special customer types box if tickets can be sold to special customer types.
Example: An event has four phases: announcement, pre-sale, ticket sales, and at-the-door sales. There are different settings for each stage for visibility and marketability. Prices vary, depending on when tickets are purchased.
The announcement phase begins on May 1. During this phase, the event is visible on the website and in the staff client, but tickets are not for sale yet. Pre-sale tickets are available from June 1 until June 30. At this time, the event is visible on the website, but can only be purchased at the service desk. Regular tickets go on sale on June 30, regular tickets can be purchased at the service desk or online. At-the-door tickets are available on the same day as the event on September 23. Day-of-tickets are visible on the website but can only be purchased at the service desk.

Upload an event picture
Images can be added to events. This is an optional detail. To add a picture to the event:
Note: The logged in user must have write permissions for the home/bxmas/resources/THEATER_IMAGE folder in order to add an image.
- Click on the gray square with the text "No image <click here>". An Image window opens.
- Select an image to upload. The selected image is uploaded in three sizes: small, medium, and large. These can be used later for display in the web portal.
- Press OK to automatically scale the image to fit the event template, or crop the image to fit. The fixed width of event images is 180 pixels with scalable height. The image is saved in the home/bxmas/resources/THEATER_IMAGE folder.
If a genre is selected for the activity, the genre image displays in the event. Users can click on the genre image to view all events for the same genre.
Note: Once an image is uploaded, it cannot be immediately replaced. The default cache time is one day.
Promo details tab
The Promo details tab contains details such as promotional text and ticket layouts.
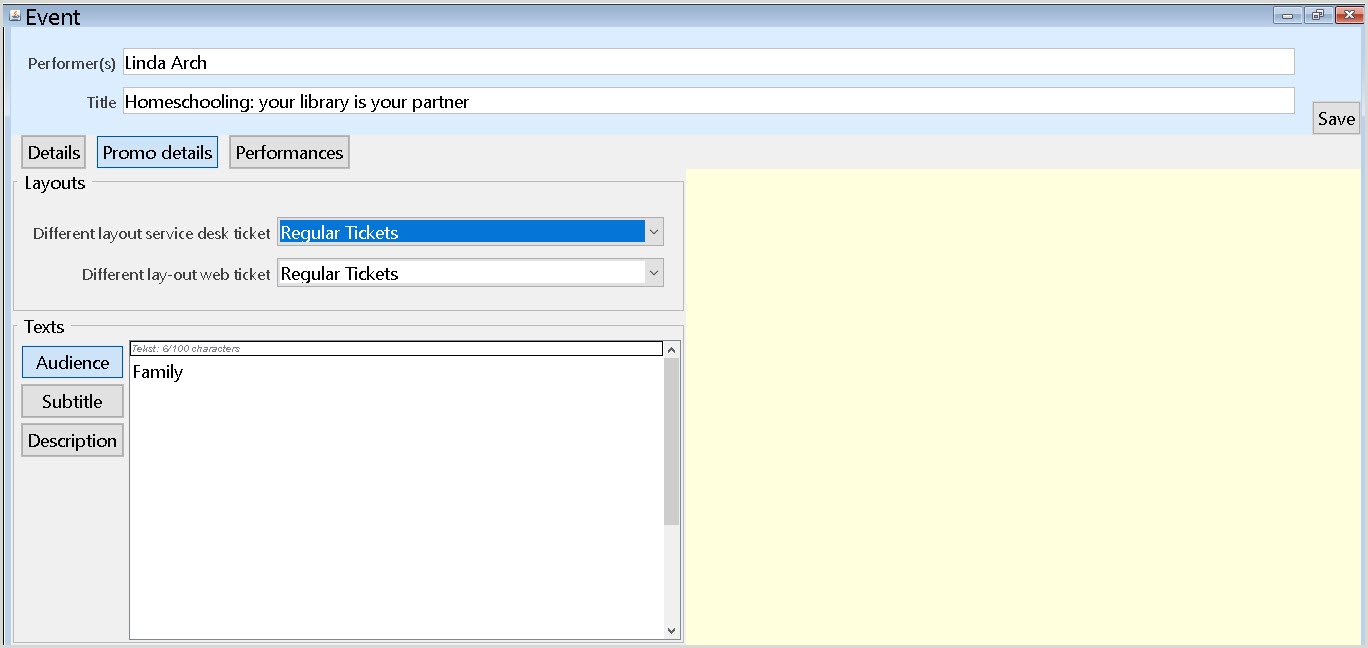
Layouts
A standard ticket layout is included in Wise. If no other ticket layouts are created, every event will use the default layout. For information about creating new ticket layouts, see Change the ticket template. The ticket layout can differ between what is used for tickets purchased online and at the service desk.
To change the ticket layout, select a different template from the Different layout service desk ticket and Different layout web ticket drop-down lists.
Texts
The text that displays in an event can be edited in the Texts box. Click on the section of text you want to edit and type the text in the text box.
| Text type | Character limit |
|---|---|
| Description | 500 |
| Subtitle | 150 |
| Class Format | 100 |
Performances tab

An event can have one or more performances at another date and/or time. For example, if your library is offering the same computer class on Saturday morning and Tuesday evening, each class (performance) of the class (event) is included on the Performances tab. The performances appear in the Performances column on the left. Click the plus sign (+) at the bottom of the page to add a performance. Provide event details for each occurrence. Fields marked with an asterisk (*) are required.
| Field | Description |
|---|---|
| Date* | Click on the calendar button to select the event date. Click OK to save. If no date is entered, the current date is used. |
| Time* | Enter the start and end times of the event. Time is entered using a 24-hour clock. Only a start time is required for time. When an end time is not provided, the system will display 00:00. |
| Intermission | If there is an intermission during the event, enter the duration of the break. |
| Result branch* | Select the branch to which the proceeds from the tickets are accounted. Only locations that display within the branch cluster are available for selection. |
| Comment | A note specific to this event. This note is displayed in the web portal and on the printed ticket (limit 44 characters). |
| Location* | Select the location that the event will take place. |
| Number of tickets* | Select the total number of tickets available for the performance. |
| Prices* | Enter ticket prices. Ticket prices can vary by Event planning phase and ticket type. Click the phase button at the top of this box to edit the prices for each phase. Enter the ticket price for each ticket type and press enter. |
Save and put tickets on sale
Once an event is created, it can be saved and edited at a later time. Click Save to save an event. When an event is saved, all of the information on the tabs event tabs are saved, so it is not necessary to save when switching between tabs. If you try to exit the Ticket management screen without saving changes, a confirmation message appears.
Once all of the required information is entered and the event is saved, tickets can be put on sale. To put tickets on sale:
- In the staff client, go to Tickets > Management > Activity management.
- Open the Events tab.
- If all of the information requirements are met, the Put on sale button will be available. Click the Put on sale button. The button changes to Remove from sale.
If the sale dates set on the Details tab have arrived, the tickets will appear in the selected areas (web and/or service desk). To pause a sale and remove the option to sell tickets, click Remove from sale.
Create new occurrences
Once an event is created, multiple occurrences can be scheduled for the same date or additional dates.
- On the Events tab, click on the plus sign (+). A calendar box opens.
- Select the date of the new occurrence.
- Enter pricing information and update any details on the Events tab that vary from the original occurrence.
- Click Save to save the new occurrence.
Change event information
After tickets are put on sale, some event information can still be modified.
Increase the number of tickets available
The number of tickets available can be increased, up to the maximum capacity of the selected location. The number of tickets to be sold can be adjusted in number of tickets.
Decrease the number of tickets available
The number of available tickets can be decreased. When the number of available tickets are sold, no more tickets will be available for purchase.
Remove an event from sale
To remove an event:
- In the Event planning box, set Visible and Can be sold to NOT FOR SALE.
- If no tickets have been sold, remove the occurrence from the event.
- On the Events tab, click the minus (-) sign in the bottom right corner of the window. A confirmation message appears.
- Click Yes to remove the selected performance.
- If tickets have been sold, you must cancel the tickets.